Intercom with wireless PTT
$200 clearance price. I have three units that will be sold with walkie talkies supplied at no extra cost ! radios have no warranty as they are ex demo but operational ..once the three radios have gone this offer no longer applies... dont miss out first in first served .
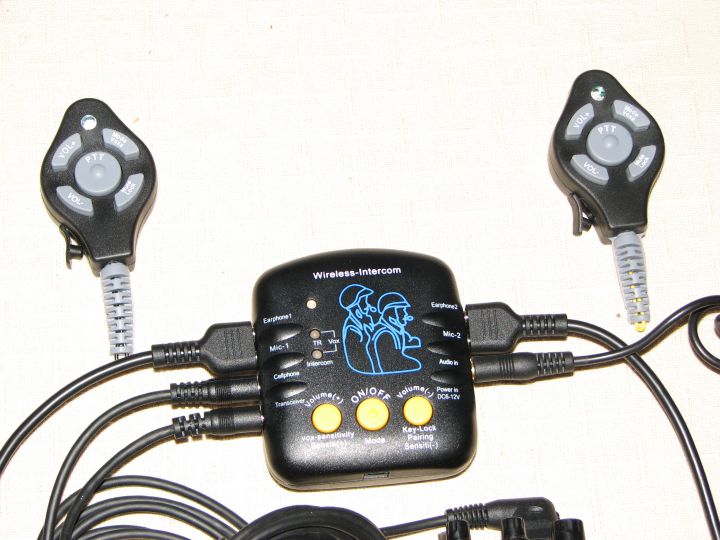
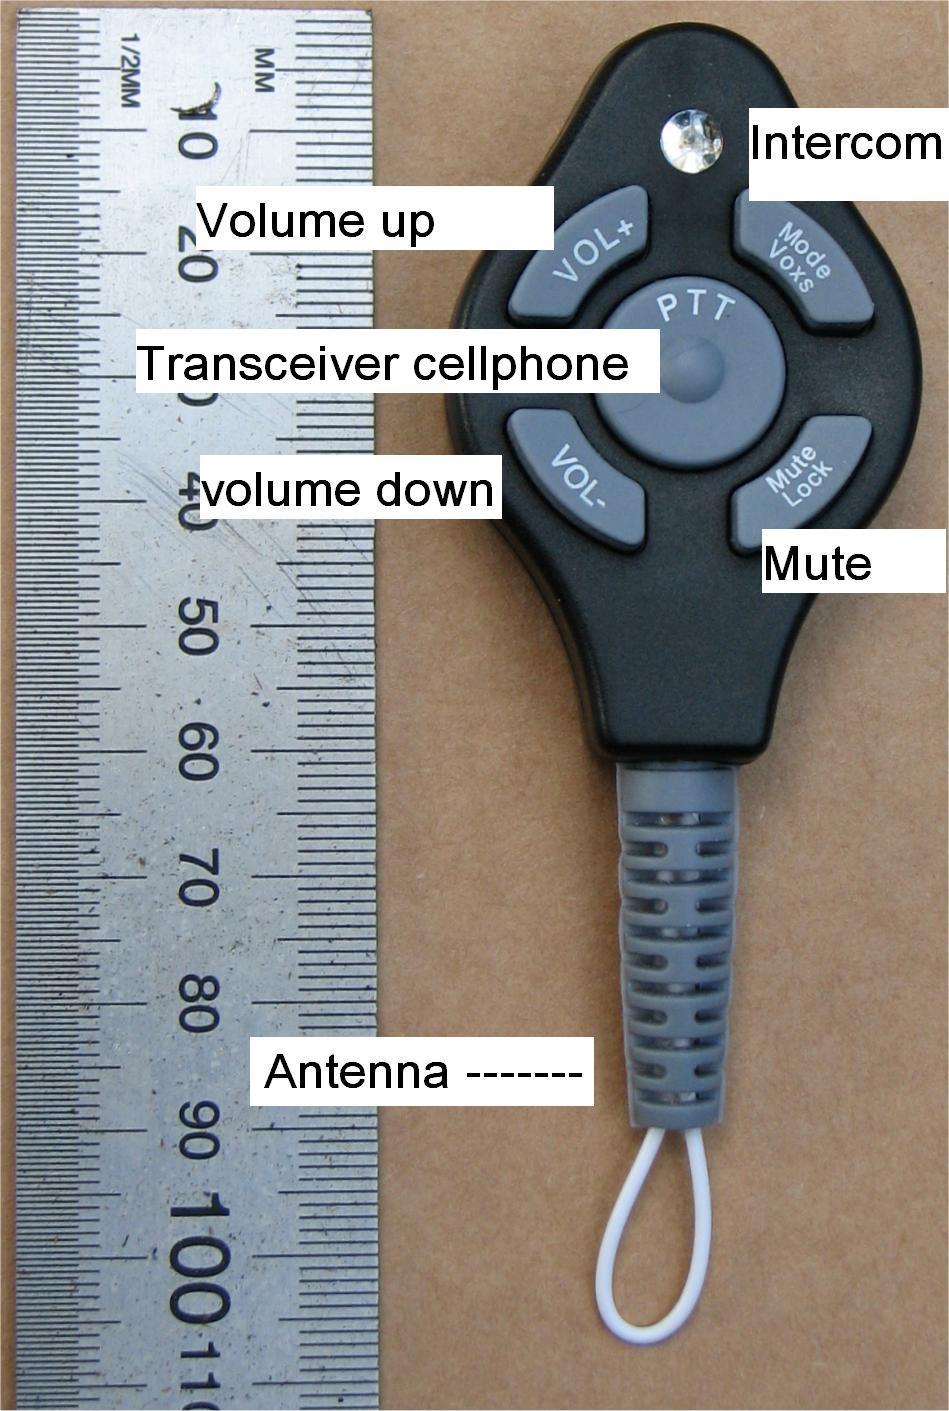
This is a self contained rider to pillion intercom that is designed to clip to the riders pocket , It comes with dual wireless control of its functions . The rider and pillion each has a small remote control unit operating at 433 Mhz , much like the car lock/unlock system , this remote unit has five function buttons
+ Vol increase button
--Vol decrease button
PTT button
Mode Vox control
Mute lock control
By use of the remote unit, the rider or pillion is able to individually control the volume in their own headset , answer a cell phone call ( rider only ) mute the music and instigate communications with the opposite party. the rider can also have control over a PRS walkie talkie connected to the system ie receive and transmit voice .
The Intercom unit has its own internal large
capacity 1000mA Lithium Ion battery which is charged be connecting the
intercomm to the usb port on a personal computer using the
supplied charging cable/230V adapter , the two handheld remotes are also charged in a similar way .
When charging the remote they show a blinking blue light when
the light has stopped blinking the remote is charged , there is a similar
system for the intercom unit as well though all the leds blink in sequence when charging .
As well as rider to pillion communication, the unit is able to input an
MP3 player via a 3.5mm stereo plug ( supplied) , A prs transceiver for motorcycle to
motorcycle communications (cables supplied but not the transceiver) , Cellphone connection
with pop port for Nokia brand (supplied) (2,5mm to 2.5mm cable is
optional extra ), and an external power input
so as not to use the internal battery ,( Supplied)
However you should be able to run
the intercom for 6 -8 Hrs continously before it requires recharging . We
have headsets with dual speakers and with wire mics only !
The headsets and mic Velcro into the helmet so no modifications are neede These headsets are thicker than the standard K series so need to be placed in the ear space in the helemt however the intercom does have more than adequet volume to enable this .
Make sure you attach the remote PTT to your hand with a lanyard or cable ! I do have spares , loss of the remote , will not be covered by warranty and they will be NZ$50 each to replace !
This Intercom is supplied with a selection of Transceiver cables and will interface with our SP808 radio and SP23022AA radios the next 3 sales will be supplied free of charge a walkie talkie of my choice to connect to this system , this is the sellers prerogative ! dont grizzle if you miss out ok, I found three radios in the store room so they are an incentive to purchase .....
Intercom
(VOX) INSTRUCTION MANUAL
1.
Power On/Off:
Hold Mode/Vox
and VOL/lock down together for a few
seconds to power on/off the Intercomm Press
and hold VOL+/ADJ
and VOL-/VOX to increase/decrease the
volume .
2.
Press and hold
simultaneously the two VOL-
and Mode/VOX
to enable/disable VOX function.
3.
When VOX is
enabled, VOX indicator LED turns on, a
short press on the Mode/POW
button enables one to alternate between
Rider/pillion communication & and transceiver mode,
use the PTT to control front &
back intercom and transceiver operation of the intercom.
4.
When VOX is enabled, VOX LED
indicator turns on, use PTT to
control the transceiver connected to
the intercom.
5.
While VOX is enabled, press and
hold the VOL+/ADJ until the VOX
LED indicator blinks, you can
adjust the VOX Sensitivity. Pressing
the VOL+/ADJ
to increase sensitivity, or pressing the VOL-/ADJ
to decrease sensitivity., When a �di�� is sound
is heard , in the earphones indicates
that the VOX is enabled
6.
, press Mode/POW to
return to non vox state.
7.
Indicator:
Talk indicator LED turns on,
indicating the intercom is in front
& back talk mode, TR indicator LED turns
on indicating the machine is in intercom mode, VOX indicator LED turns
on indicating VOX is switched on. Talk indicator LED
or TR indicator LED blinks
to indicate that the machine
is in front & back talk mode , intercom mode or in use.
8.
CD
and MP3 operation:
When connected and enabled ,an amplified
external audio source (CD or MP3 signals) heard by rider
and pillion.
9.
The user can
remotely control volume and mode through the
PTT1 or PTT2 button
10.
Front & back talk: when VOX is switched off, while in front & back talk,
press and hold PTT1 or PTT2 till �gu�� is sound, when Talk indicator
blinks, you can start front & back talk. (when mobile is connected with it,
not until press and hold PTT1 for 1 second can you start front & back talk).
When VOX is switched on, speak loudly to microphone till �gu�� is sound,
when talk indicator blinks, you can start front & back talk.
12.
When a call is
received , press the PTT1
button quickly twice, when
�di�di�� sound is heard, you
can answer the call, if the unit fails to answer, fast press PTT1
once a third time try again. To terminated the cell call ,press the PTT1
button quickly twice till �di�di�� is heard, it will then hang
it up, if you fail to hang it up, repeat the above
13.
Note: only
earphone 1 can communicate with the cellphone .
14.
15.
Listen to Nextel intercom: Nextel Intercom
must be inserted in Mobile telephone, when a call comes in, press and hold PTT1
for more than 1 second to enter NEXTEL intercom, then you can operate it as you
do a common intercom, namely, press PTT1
intercom, release it to listen to the caller, should both sides say nothing
within 12 seconds, the system will exit NEXTEL state.
16.
Caution: to enter
NEXTEL intercom state again, you must wait to be called by the caller first,
then press PTT1, if the caller
doesn�t call you, press PTT1, and
the system will revert to front
& back intercom mode.
17.
Operations of intercom: while in intercom mode, press and hold PTT till
�Gu�Gu�Gu�� is heard, after that
the TR indicator LED blinks, the
voice will be sent transmitted (if a
mobile is connected to the intercom , you must press
and hold PTT1 for 1 second can
intercom mode can be initiated). When signal is received, the intercom will
switch to the received call automatically, , Rider and pillion will hear the
received voice
18.
External power supply: if required you can use a external power supply (6-12V).
negative earth
19.
Charging: The
unit requires charge voltage of DC5V, The intercom can
be charged via any computer USB socket. Insert the USB charging plug, and the
intercomm will automatically enter charging mode, The three indicators will
blink in sequence until the
internal 1000mAh (3.7V) lithium Ion cell is
fully charged. This usually takes
about 3 hours to achieve full charge.
Expect about 6 -- 8 hours continuous use
from a charge .
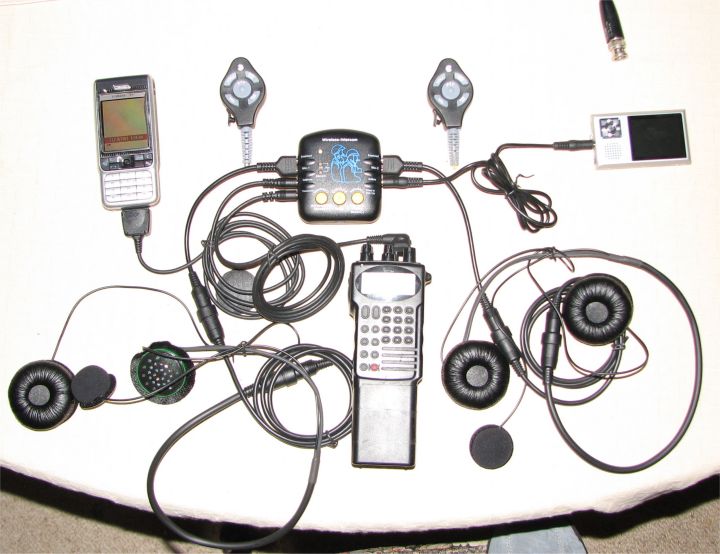
Not supplied are the MP3 payer, Cellphone, two way radio !!Now
in Stock NZ $200
These are new stock and have gone up in price because the NZ
dollar has fallen from 70 cents to 50 cents when I purchased them
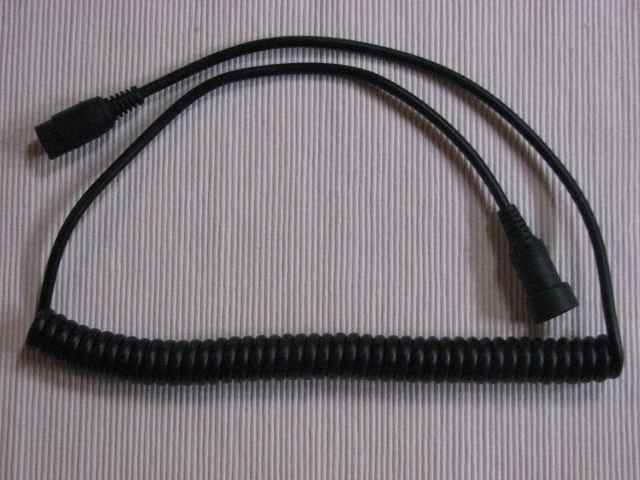
We now have in stock the headset extension cables for rider and pillion at $10 each, these will stretch out well in excess of 1.2m long
Testimonial
Want to go back to Motorcycle communications? ...... click here!
Pinfold Health Services Ltd,1172 Arawa St, Rotorua 3201,New Zealand. ph +64-7-3488850 fax +64-7-3486555 pinfold@xtra.co.nz